Rendering
This section describes important rendering options and tools that can significantly improve your application.
Fixed Foveated Rendering
Set the FFR Level
There are multiple ways to set the FFR level. FFR level is one of the following values:
- FFR Off (index = 0): No reduction of resolution. (Default)
- FFR Low (index = 1): The lowest level of resolution reduction.
- FFR Medium (index = 2): The medium level of resolution reduction.
- FFR High (index = 3): High level of resolution reduction.
- FFR High Top (index = 4): The highest level of resolution reduction. Provides more detail near the bottom of the view and more foveation near the top.
Project Settings
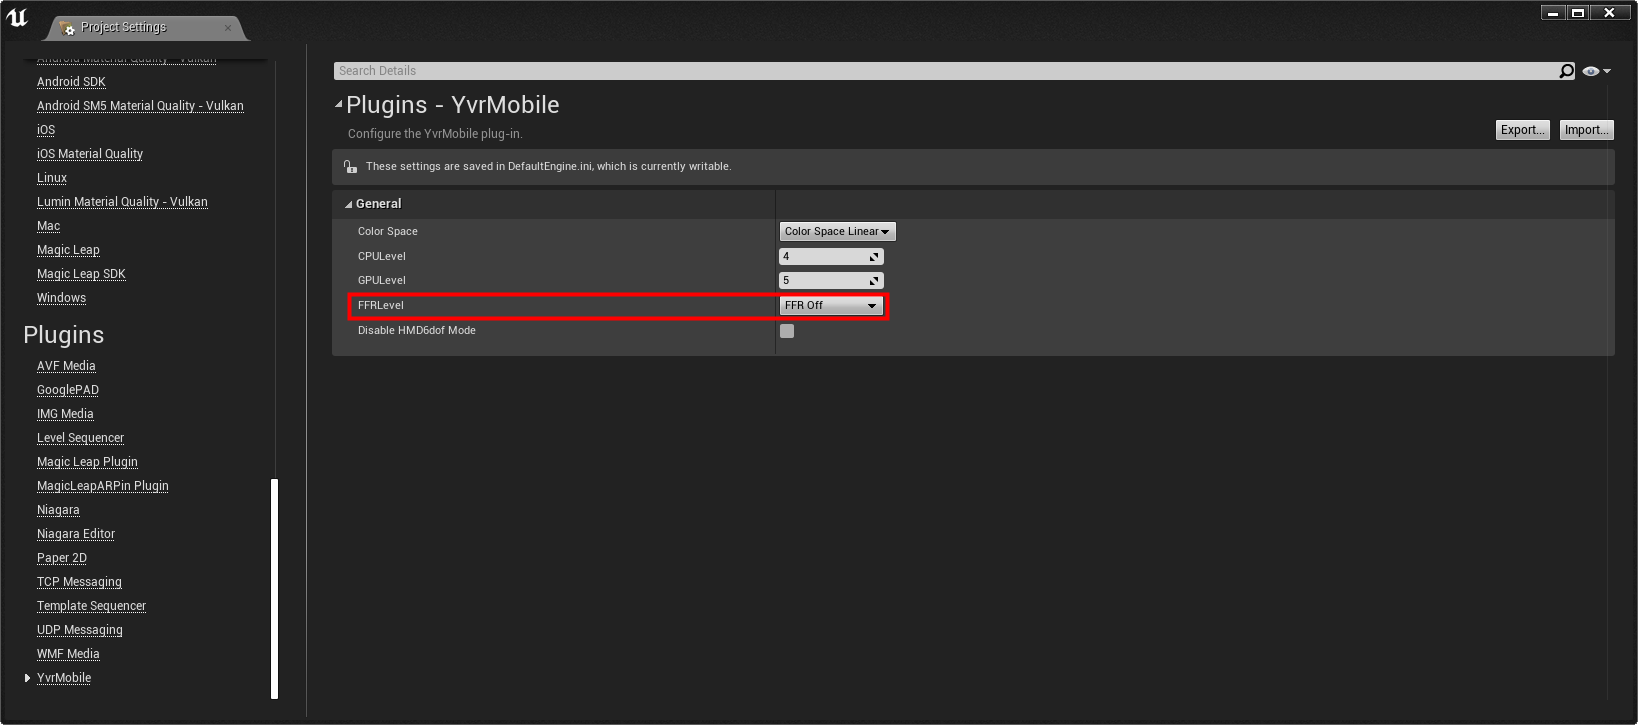
You can set the FFR level in your Unreal project settings. To access these settings:
In Unreal go to Edit > Project Settings > Plugins > YvrMobile.
Use the FFRlevel to set the desired foveation level.
API to Set FFR
You can set the level of FFR to any the following indexes using the following method:
void UYvrFunctionLibrary::SetFixedFoveatedRenderingLevel(EFixedFoveatedRenderingLevel level)
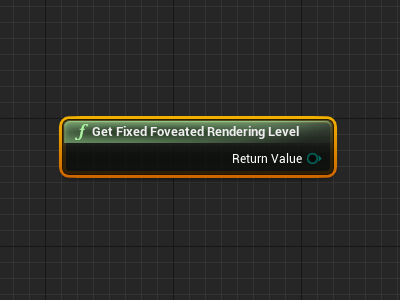
Blueprints to Get and Set the FFR Level
You can get and set the FFR level using the following blueprints:
Multi-View
Multi-View is an advanced technique for VR rendering. If your application is CPU-bound, we strongly recommend using Multi-View to improve performance.
In typical stereo rendering, each eye buffer must be rendered in sequence, doubling application and driver overhead. When Multi-View is enabled, objects are rendered once to the left eye buffer, then duplicated to the right buffer automatically with appropriate modifications for vertex position and view-dependent variables such as reflection.
Enable Multi-View
- Open Edit > Project Settings > Engine > Rendering.
- In the VR section, enable Mobile Multi-View.
The following image shows an example.

Stereo Layer
Stereo Layers allow you to send a separate Texture to the VR Head Mounted Display (HMD) and have it re-projected in a separate rendering pass than the rest of the project. This is extremely useful for User Interface (UI) elements that you want to attach to the HMD but not be affected by post processing or anti-aliasing. In the following document, we will go over how you set up and use Stereo Layers across all VR Platforms that are supported.
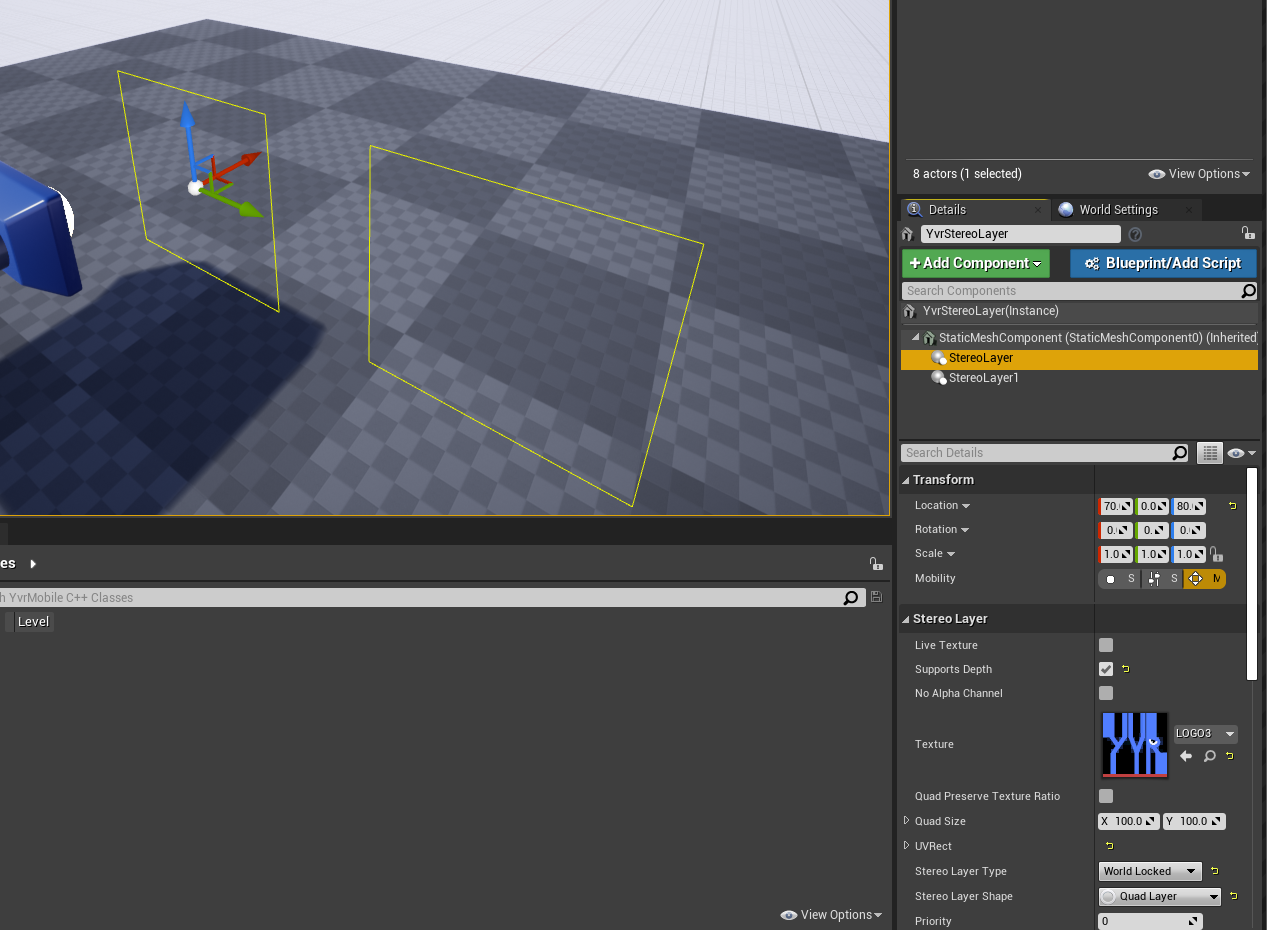
To create an overlay
- Create a Pawn and add it to the level.
- Select the Pawn, select Add Component, and choose Stereo Layer.
- Under the Stereo Layer options, set Stereo Layer Type to Quad Layer(So far we only support this type).
- Set Stereo Layer Type to Face Locked, Tracker Locked, or World Locked.
- Set the overlay dimensions in world units in Quad Stereo Layer Properties.
To create an underlay
- Select Supports Depth in Stereo Layer to set your compositor layer to not always appear on top of other scene geometry.
Other supported attributes:
Live Texture: True if the stereo layer texture needs to be updated every frame.
No Alpha Channel: Determine if the stereo layer texture has alpha channel.
Quad Preserve Texture Ratio: True if the quad should internally set its Y value based on the set texture's dimensions.
Priority: Determine different stereo layers draw order. Layers with higher priority are rendered on top of layers of lower priority.